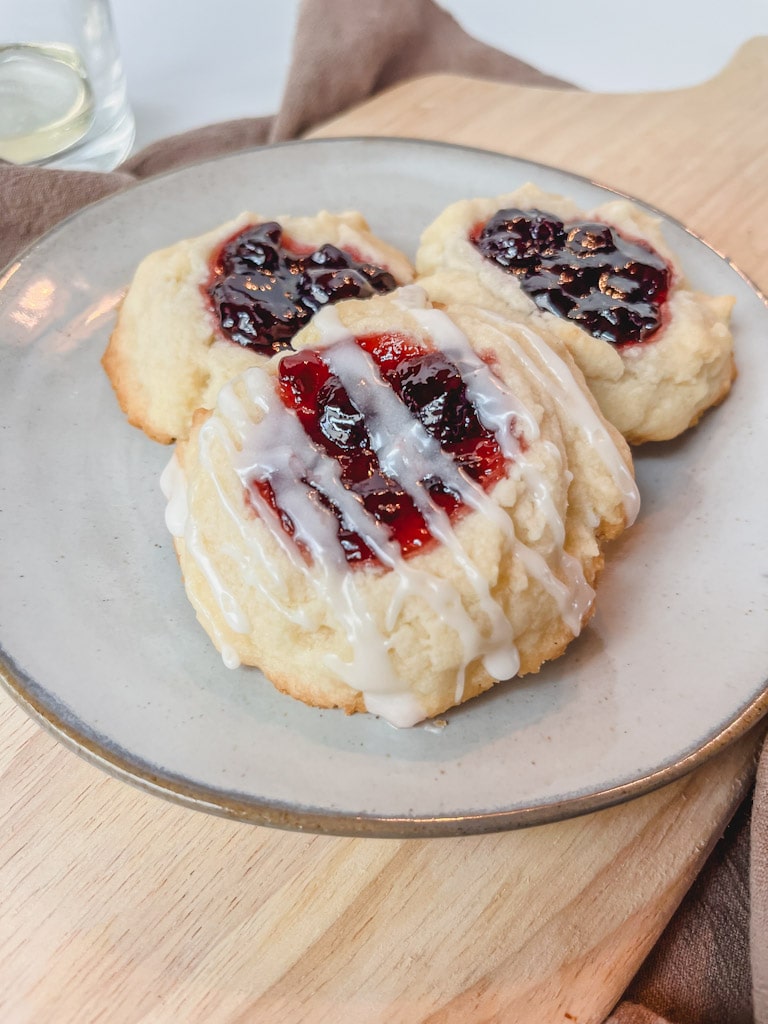
These crumbly, decadent Cherry and Almond Thumbprint Cookies are going to rock your world! The shortbread is thick and the cherry preserves give the perfect amount of sweetness to the cookie. Add a glaze and everyone will love you!

As an Amazon Associate, I earn from qualifying purchases, at no cost to you. This post may contain affiliate links. Please read my full disclosure policy and privacy policy.
I think I’ve finally perfected these jam thumbprint cookies! And they are ridiculously easy to make with very few ingredients. Also to note, my husband has officially declared these as his favorite cookies. Coming from him, that’s saying a lot since he’s always the one to skip dessert at dinner. Blasphemy, lol! But the way his eyes glazed over from these cherry almond cookies, I knew these were a winner!

The Players aka The Ingredients
- Butter – I like to use salted butter. Make sure it’s room temperature butter.
- Powdered Sugar – This will add sweetness to the shortbread cookies. We’re also using this for the optional glaze on top.
- Almond Extract – This helps accentuate the Cherry preserves that go in the center of the cookie. There is a dash of Almond extract in the glaze too. You can swap the Almond extract out for Vanilla extract if you prefer.
- Flour – I use all purpose flour for these cherry thumbprint cookies.
- Cornstarch – This is going to help thicken up the cookie and give it a crumbly texture.
- Cherry Preserves – For this recipe, I use Cherry preserves, but feel free to use any preserves that you love!
- Milk – I use whole milk to make the glaze, but feel free to use any milk you have on hand.
Watch me make these Cherry and Almond Thumbprint Cookies on my YouTube Channel!
How to Make Cherry and Almond Thumbprint Cookies
In a large mixing bowl in a stand mixer with the paddle attachment, cream butter, and powdered sugar together until well combined. Add in your Almond extract and mix in your flour and cornstarch. Mix on medium speed for about 1 minute. You don’t want to over-mix this dough. The dough will be a bit wet but this is perfect.

For this Cherry and Almond Thumbprint Cookie recipe, I like the look of imperfect, rustic-looking cookies. I want them to be taller and thicker, not flat like most thumbprint cookies. To do this, take about 2 tablespoons of dough and drop the cookie dough balls onto your prepared baking sheet that has been lined with parchment paper. I don’t even roll them, just plop them on your rimmed baking sheet. I personally, love to use a baking silicone liner. Additionally, you can use a small cookie scoop.

In the center of each cookie, create a deep indentation using either the back of your thumb or the back of a measuring teaspoon. Similarly, you can also use the handle end of a wooden spoon to make a small indent for the cherry jam to be placed. Place about 1 teaspoon of cherry preserves in the center of each ball of dough where you made your indentation.

Bake cookies in the oven for 15-18 minutes. You want the edges to be very slightly golden brown. Allow the cookies to rest on the cookie sheet on top of a cooling rack for at least 10 minutes before adding the glaze.
This next step is completely optional. Some might find the cookie is sweet enough without the additional glaze, but it’s a great way to sneak in a little more of that almond flavor into the cookie.

In a small bowl, combine the powdered sugar, almond extract, and milk to create a thick glaze. You can watch me make these cherry almond thumbprint cookies on my YouTube channel! Take a small spoon and drizzle the glaze over the top as little or as much as you’d like. You can also use a piping bag if you’d like, but the spoon is way easier, plus we’re not looking for perfection here.
Storage Instructions for Cherry and Almond Thumbprint Cookies
To store these Cherry and Almond Thumbprint Cookies, place cookies in an airtight container or wrap with plastic wrap and leave on counter for up to 3 days. But I can guarantee you, they won’t make it to day 3 haha!
Adding Preserves Before, During, or After Baking Cookies?
I wanted to experiment with adding the Cherry preserves to the cookie before I baked them, in the middle of baking the cookies and after the cookies have been baked.
If you want your preserves to be more solidified into the cookie, you’ll want to add your preserves to the cookie before baking. It will help adhere the preserves more to the cookie.
Secondly, around the 8 minute mark, I added my Cherry preserves to a couple of the cookies and placed them back in the oven.
Lastly, I added the Cherry preserves to a couple of cookies once the shortbread cookies were done baking.

In conclusion, I found that it made no difference in taste or appearance when adding the preserves halfway through or at the end of baking. However, the preserves that were added before placing in the oven, were much more solidified and more likely to stay put if transporting the cookies.
Personally, I liked the ‘baked-in’ taste of the preserves! It felt much firmer and less messy compared to the preserves that were added later.
Variations of Preserves
While I love the taste of Cherry preserves, use your favorite jam! You can use any variety of preserves, jams, or jellies that you’d like. Here are additional flavors of jams and preserves to try for your next thumbprint cookie:
- Blueberry
- Apricot
- Strawberry
- Blackberry
- Raspberry
- Grape
- Lemon

Jelly, Jam, and Preserves: What Should I Use for Thumbprint Cookies?
While there are some differences between jelly, jam, and preserves, you can use any of these to make your thumbprint cookies! Here are the differences:
Jelly – Has no pieces of fruit in it and is very smooth. Typically kids enjoy this in their peanut butter and jelly sandwiches since there are no large chunks of fruit.
Jam – Is made with fruit that has been mashed or crushed and is evenly distributed throughout the jam.
Preserves – Has large pieces of fruit chunks throughout the preserves, which some people either love or some people hate.

Year Round Cookies
Because of the several different ways you can top these cookies, these are hands down the best cookie recipe! You don’t have to place preserves on top if you’re not a fan or maybe you want to experiment with different toppings. Perhaps leave off the jam and bake the cookies as a shortbread cookie and once they’ve cooled, drizzle with dark chocolate! Or perhaps a lemon curd thumbprint cookie is up your alley! Just make sure to add your lemon curd after baking while they’re cooling.
These cookies would also be great as a cookie exchange at Christmas time! The possibilities with this cookie recipe are endless!
Looking for other dessert recipes? Give these recipes a try next:
- The Best M&M Monster Cookies
- Starbucks Iced Lemon Loaf Copycat Recipe
- A Classic, Homemade Blueberry Pie
- Starbucks Dupe Pumpkin Cream Cheese Muffins
- The Best Fresh Berry Summer Cobbler
Pin it for Later!
If you end up making these Cherry and Almond Thumbprint Cookies, let me know which preserve you ended up trying. I’d love to chat with you!


Cherry and Almond Thumbprint Cookies
Ingredients
Shortbread Cookies
- 1 cup salted butter, softened (2 sticks)
- 3/4 cup powdered sugar
- 1/2 tsp almond extract
- 1 1/2 cup all purpose flour
- 1/4 cup cornstarch
- 3/4 cup cherry preserves
Almond Glaze
- 3/4 cup powdered sugar
- 3 tsp milk
- 1/4 tsp almond extract
Instructions
- Place oven rack in middle of the oven and preheat oven to 350 degrees Fahrenheit. Line a cookie sheet with silicone liner or parchment paper.
- In a large mixing bowl, cream together butter and powdered sugar. Add almond extract. Mix in flour and cornstarch until well combined. Do not over mix.
- Drop large spoonfuls of dough onto silicone liner (about 2 tablespoons) without rolling dough into balls. With the back of your thumb or spoon, gently make small indentations in center of dough balls. Place about a teaspoon or two of preserves.
- Bake for 15-18 minutes, checking them at the 15 minute mark.
- While cookies are baking, make the glaze. Whisk together powdered sugar, milk, and almond extract. Add a little more milk if too thick or add more powdered sugar if too thin.
- Allow them to cool on cookie sheet for 10 minutes before moving them to a cooling rack.
- Drizzle the glaze with a small spoon over the cooled cookies. Enjoy!
Leave a Reply